Web Panel
panel.web3pi.io is the cloud dashboard for your Web3 Pi UPS: claim your unit, watch its telemetry and events, and send remote commands — even when the power or your home network is down. It requires the LTE-M module; out of the box the device reports in MQTT mode, which needs no configuration on the device at all.
Create an Account
- Open
https://panel.web3pi.io. You are redirected to the Web3 Pi sign-in page atauth.web3pi.io. - Click Need an account? Sign up. and register with your email address.
- Confirm the verification link sent from
noreply@web3pi.io— the account is active only after verification. - Sign in. Optional two-factor authentication (authenticator apps, passkeys/security keys, backup codes) is available under your avatar menu → Account settings.
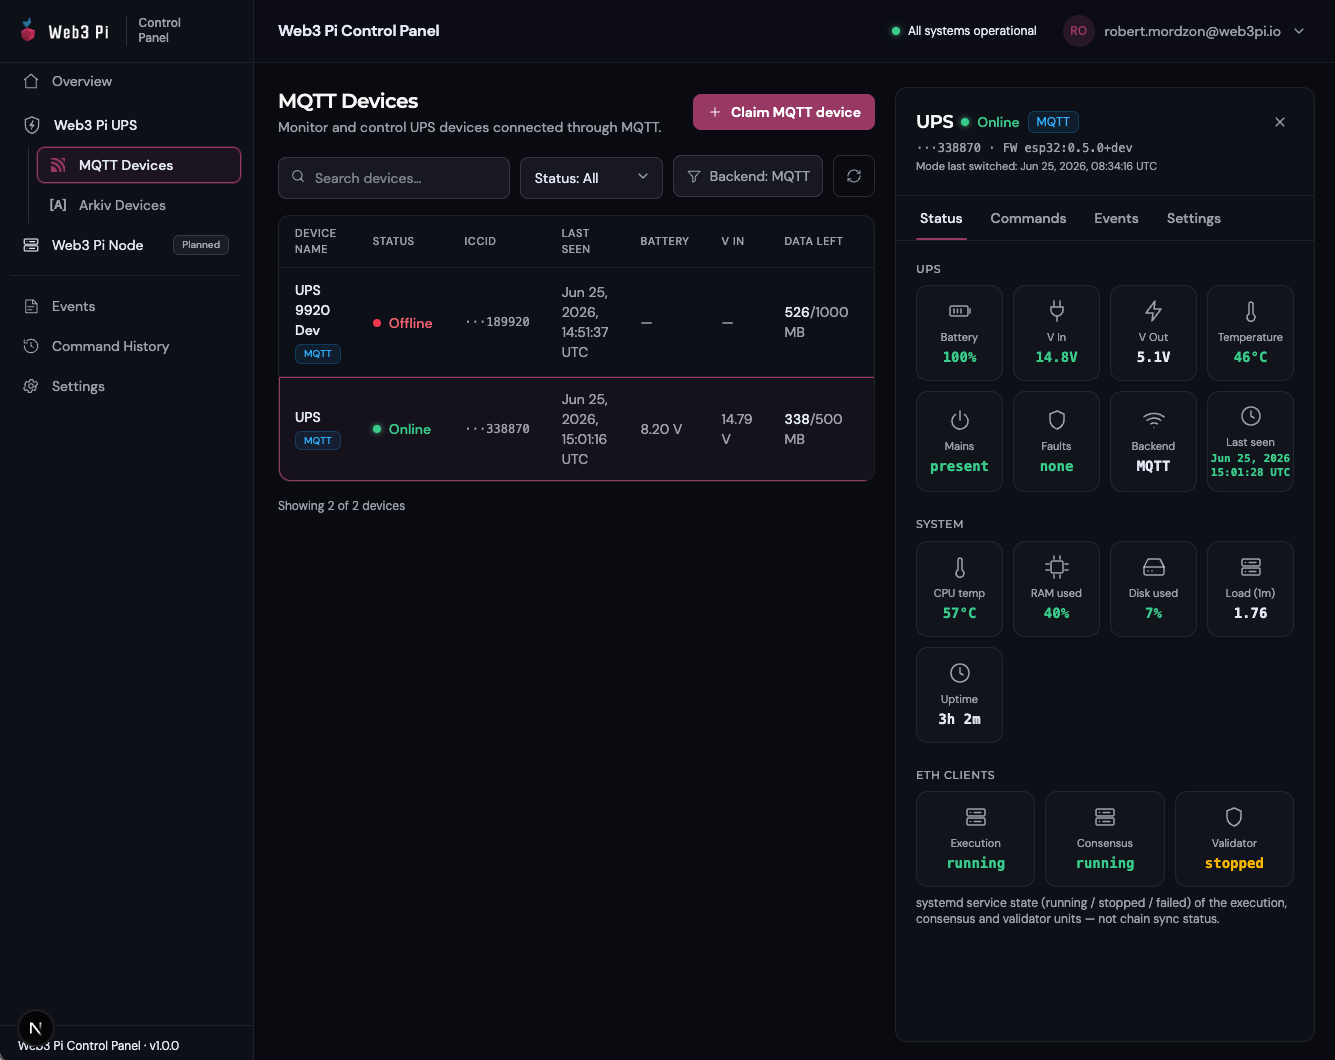
After signing in you land on the Overview page; your devices live under Web3 Pi UPS → MQTT Devices:
Claim Your Device
A device only shows up in your panel after you claim it.
- Go to Web3 Pi UPS → MQTT Devices and click Claim MQTT device.
- Enter the ICCID (19–20 digits, printed on the SIM tray) and the claim token (format
XXXXX-XXXXX) included with your UPS. - Confirm — the device appears in your list and its telemetry lands within about 30 seconds.
Arkiv devices are claimed under Web3 Pi UPS → Arkiv Devices with a crypto wallet and the 4-word claim code from the device OLED, and the binding is confirmed on the UPS itself. Follow the walkthrough in Arkiv mode.
One device, one owner
A device belongs to exactly one account. For MQTT devices the claim token stays valid for the device's whole life: to sell or hand a unit over, open its Settings tab and use Release device — the new owner claims it with the same ICCID and token. Arkiv devices are bound to a wallet instead; releasing in the panel does not clear that binding — a factory reset on the device does (see Arkiv mode).
What You See
The sidebar lists your units by backend mode (MQTT Devices, Arkiv Devices), plus fleet-wide Events and Command History. The device list shows each unit's name, online state (online = reported within the last 3 minutes), battery and input voltage, last-seen time, and remaining SIM data. Click a device to open its detail pane with Status, Commands, Events, and Settings tabs.
The Status tab updates live:
- UPS — battery charge, input/output voltage, temperature, mains present, fault state.
- System — host stats from the companion service: CPU temperature, RAM, disk, load, uptime.
- ETH Clients — execution / consensus / validator shown as running, stopped, or failed. This is the service state on the Pi, not chain sync status.
Devices report roughly every 30 seconds over LTE, but power-loss and fault events are pushed immediately — an outage shows up in the panel within seconds.
Remote Commands
The Commands tab targets the selected device:
| Group | Commands | Notes |
|---|---|---|
| UPS output | Power on · Power off · Cycle output | Cycle cuts output for 1.5 s — hard-reboots the Pi |
| Raspberry Pi | Reboot OS · Shutdown OS | Graceful shutdown; the UPS keeps supplying power |
| Diagnostics | Request status · Beep / self-test | |
| Ethereum clients | Start · Restart · Stop per client | Acts on the whitelisted services on the Pi |
Destructive commands ask for confirmation. On MQTT devices every command is tracked from accepted to confirmed by device (or failed / timed out). On Arkiv devices each command requires one wallet signature and may show as submitted on-chain rather than confirmed — see Arkiv mode.
Events and Command History
Events collects power and host alerts from your whole fleet — mains lost/restored, battery low/full, faults, imminent host shutdown, low disk, backend-mode changes — filterable by device, severity, and date. Command History logs every issued command with its status, latency, and the account that sent it.
Settings
Per-device settings live in the device's Settings tab: rename the unit, review backend details (full ICCID, remaining data, hardware revision, firmware version, claim date), and release it in the Danger zone. Account-level settings (password, two-factor, active sessions) are managed in your Web3 Pi account via the avatar menu → Account settings.
Running your own backend?
Devices switched to HTTP mode report to your own server instead — the panel can still list them, but live telemetry and commands go through your server.